Installation Guideline
Online Review
Click to review Antikor online.
Username: demo_en
Password: demo_en
Steps That Must Be Made Before Installation
Product Verification Producers
Verification procedure by the receiving party is performed by comparing md5sum of the received media.
• Customer ensures that the security seal is not broken upon receiving.
• Customer verifies the product name and version.
• Customer generates an md5sum of the medium and compares it to the md5sum of the ISO at the official web page.
• Installation process can begin if the computed md5sum and the md5sum available at the webpage are the same.
Physical and Logical Security
1. The Antikor installed hardware must be located in the secured system room Entry and exit to the room should only be done by authorized persons.
2. Backups of the Antikor should be kept regularly.
3. If the Antikor installed has USB ports on the hardware, it must be disabled.
4. The hardware which the Antikor is installed the power supply and ethernet cables, etc. must be checked.
5. The password information of people who will access the Antikor should not be the same as the admin password and their authority should be restricted.
6. Users accessing the Antikor must change their password at specific time periods.
7. The security of the user name and password information of the system administrators who access the Antikor is their own responsibility. By using this software, the system administrator accepts that has taken the necessary measures to protect the security of the user name and password information. Epati Information Technologies accepts no cost or liability if there is a direct or indirect loss resulting from the security of the user name and password information.
Hardware Requirements
Computers work according to the slowest component. As can be seen from the following articles, each component has many parameters. The most important components in any Firewall are CPU, Ram Speed, Ethernet, and a Hard-disc. These components determine the Internet traffic that passes through the device. Throughput on Firewalls is affected by all peripheral components, from input (Ethernet), where packets are processed (CPU-Ram), to self-connected switches and Internet Bandwidth.
Components required for Antikor, an Integrated Cyber Security System are as follows:
1. Minimum 8 Core Xeon (excluding logical cores)
2. Minimum 32 GB DDR4 2133 Mhz Ram
3. Minimum 4 port multi queue Ethernet adapter
4. Minimum 256 GB SSD
CPU (Processor)
Applications that require intensive computing, games and physical calculations are the areas where CPUs becomes important.
Antikor software supports multithreading. Therefore, there must be at least 8 cores as Processor.
RAM (Memory)
The RAM on the Firewalls is the unit where all operations and package checks are performed. For this reason, RAM speed is very important. Latency is the time difference (delay) between packets entering and leaving a system.AntiKor’s RAM speed should be minimum DDR4-2133 Mhz. Today, the emergence of DDR5 memory and doubling of data paths is a major development for Firewalls.
Ethernet (Network) Adapter
In any Firewall the Ethernet Adapter must be a multi-que Ethernet Adapter. This will allow Ethernet drivers to disperse onto multiple core.
Recommended Ethernet adapters are as follows:
• Intel i210 Ethernet adapter 2 port 1 GBit/s (for SMEs)
https://www.intel.com/content/dam/www/public/us/en/documents/datasheets/i210-ethernet-controller-datasheet.pdf
• Intel 4 port 1GBit/s i350 Ethernet adapter, with each port has 8 TX/RX paths, meaning that Ethernet drivers can be dispersed on total 32 cores (for medium size SMEs)
http://www.intel.com/content/www/us/en/ethernet-controllers/ethernet-i350-server-adapter-brief.html
• The other 2-port Intel x540 models also running 10 GBit /s, and each port can be distributed to 128 queues (For larger enterprises)
http://www.intel.com/content/dam/www/public/us/en/documents/datasheets/ethernet-x540-datasheet.pdf
• Again another 4-port Intel x710T models running at 10 GBit/s (For larger enterprises)
http://www.intel.com/content/www/us/en/support/network-and-i-o/ethernet-products/intel-10-gigabit-server-adapters/intel-ethernet-converged-network-adapter-x710-series/intel-ethernet-converged-network-adapter-x710-t4.html
Hard Disk (Storage)
If the program to be used has a heavy hard disk usage rate, requiring constant writing onto and reading from disk, the hard disc become more important. Hard disks vary in size and speed. Types of disk include SATA Disks, SAS Disks, SSS Disks, and recently SSD NVMe Disks are introduced to market. When the system administrators commission a service or system, they consider only the capacity with respect to disk requirement. Naturally, when load becomes heavier in the medium and long term bottlenecks occur thereby resulting in losses in performance. The only reason for this is that total IOPS and Throughput have not been correctly estimated, or been taken into account at all. So, what are these values and what functions do they have? As name suggests, IOPS (Input/output operations per second) is the maximum number of writing or reading operation per second while Throughput represent the task carried out at a certain interval. Generally, this is the value indicating how much data is written or read in MB per second.
For example, in the case of camera software size more important. Software’s writing speed is constant. We may think that total workload of this particular server shall be comprised of 10% reading and 90% writing. Reading occurs only when we browse the images we have taken.
Let’s take FTP file servers as another example. Total workload of this serves shall be comprised of 80% reading and 20% writing. Generally, downloading from file serve entails reading from the disk while uploading a file entails writing on a disk.
Functional IOPS = ((Total IOPS writing %)/(Raid penalty ))+(Total IOPSreading %)
Note: In this formula RAID 0 shall be calculated as Raid Penalty 1, RAID 1 as Raid Penalty 2, RAID 5 s Raid Penalty 4, and RAID 6 as Raid Penalty 6.
As can be seen, the same discs give completely different results with different raid structures and reading and writing rates. Because Antikor entails database operations and Logging, at least 256GB SSD Disk type is preferred as disk type and size.
Note:After you perform the Antikor setup any hardware other than RAM should not be mount (ethernert card, harddisk etc.). Because, the Antikor will switch to “safe mode” for security purposes and will not perform its function.
1. For the device to be installed, Ethernet cards must be connected in accordance with the network structure or Ethernet cards must be opened if the virtual installation is to be performed. For example, if WAN, LAN, and DMZ are to be used, 3-port Ethernet card or 3 separate Ethernet cards must be connected. If installing via virtualization, 3 Ethernet ports should be opened. The Ethernet card should not be added or removed after the installation is complete.
2. For the device that has been set up, the “Last State” setting must be on continuously. For this the BIOS settings must be checked.
Note: If there is a firewall in the network environment where Antikor is to be installed, the server IP address where Antikor is installed, the ports 7001 and 7002must be open for communication with the license server. These ports can only be opened for access to the IP address of the Antikor license server. You can contact the Technical Team for the license server IP address.
For testing;
telnet lisans.epati.com.tr 7001
telnet lisans.epati.com.tr 7002
Installation Phase
Click.
to GET ISO File
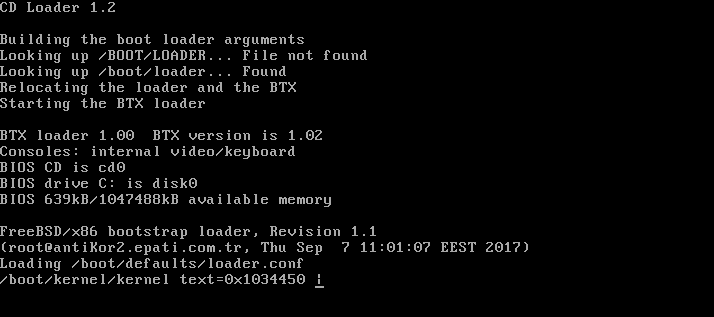
When “CD Loader” is written on the first line on the screen above, it indicates that the installation has started.
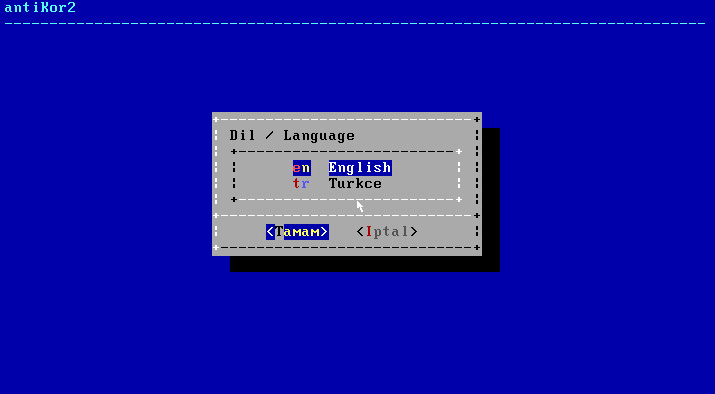
Choose Language
If the CD successfully runs, Language Chooseion will appear first prior to installation. Choose the desired language and click OK.
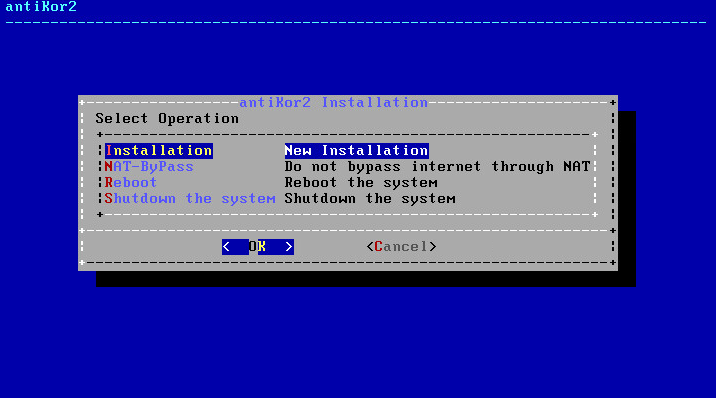
In above screen; “Installation” is for a New Antikor version.
- Nat-Bypass
is for accessing Internet by bypassing Antikor, which is already installed.
- Re-start
is for restarting the installation.
- Shut Down System
is for powering of the system.
Since you are going to perform a new installation we choose “Installation” and proceed.
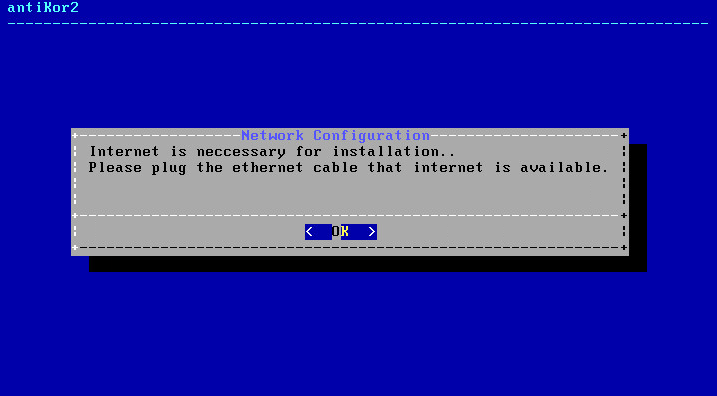
Ethernet connection is needed for installation.
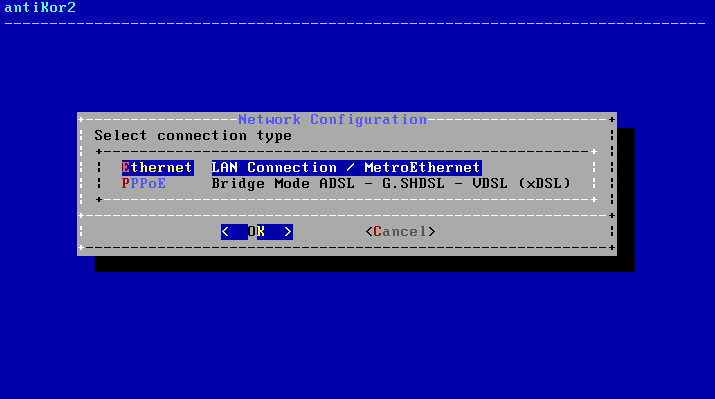
Choose Internet connection type.
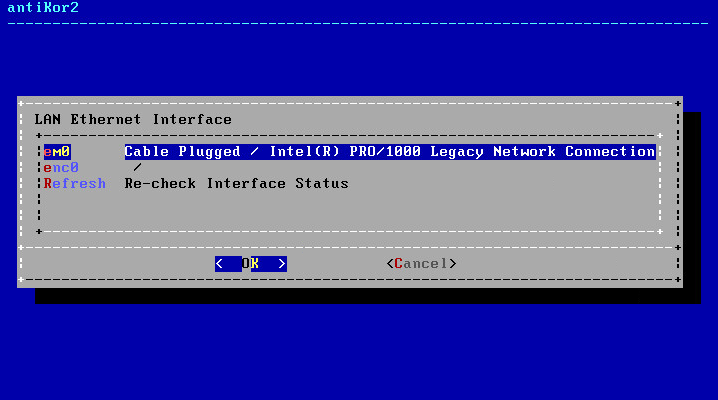
In this screen there are 4 Intel Ethernet connections. Choose desired Ethernet connection for installation and proceed with installation.
Note: In the event no Ethernet adapter is showed, check connections and choose “Refresh Recheck Status” option.
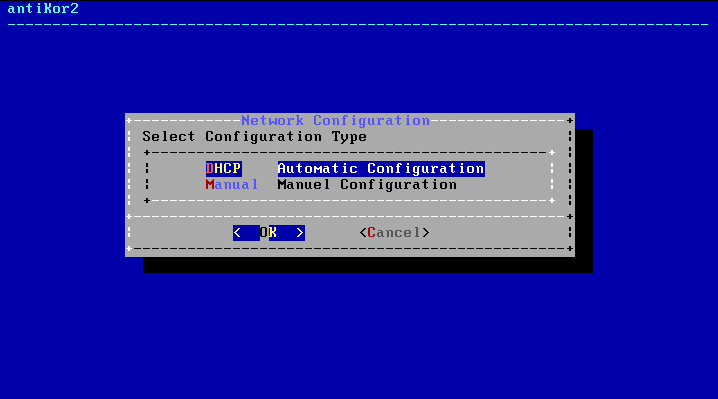
By choosing DHCP, the system will connect to the Internet by chooseing an IP from the list of IPs that are being distributed. If there is no system to distribute IP, a manual IP is taken thereby connecting to Internet.
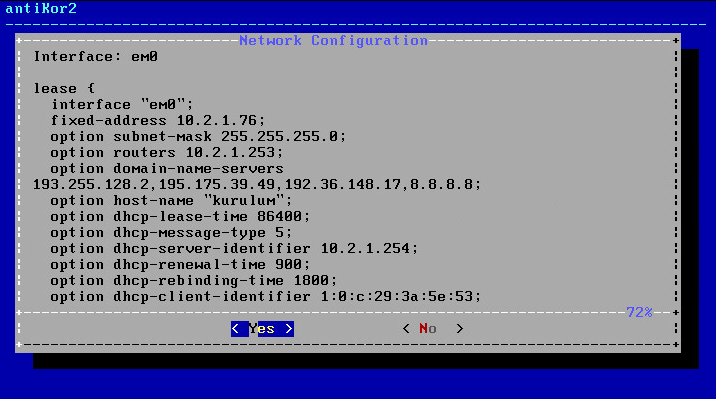
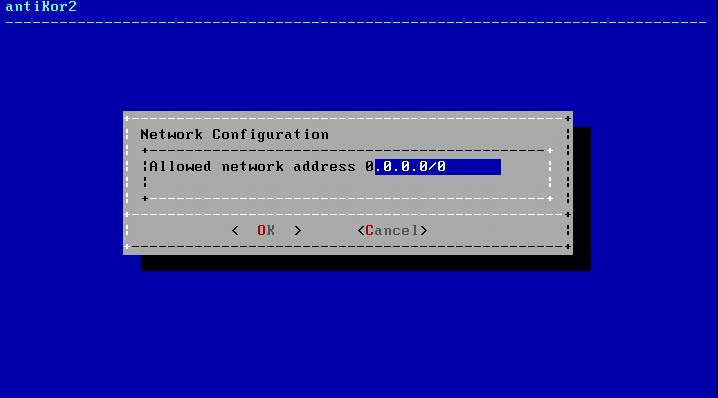
If the internet access is available as stated above, the authorized IP block to access the Antikor shall be specified.
Enter License number in next screen.
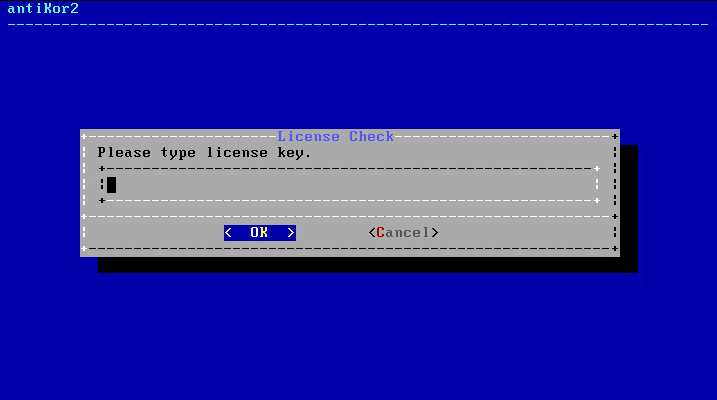
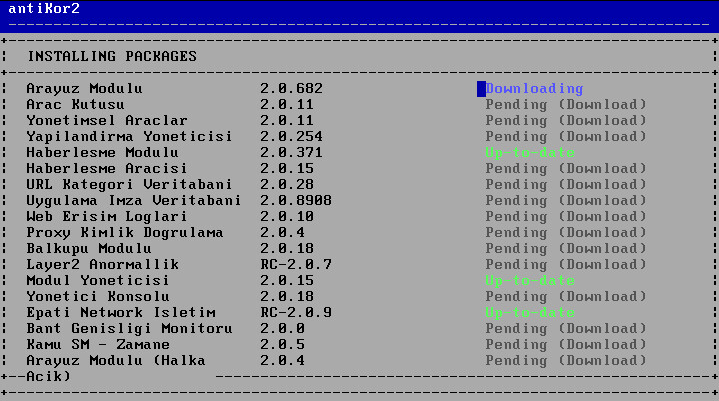
Package shall begin to be downloaded if License is verified.

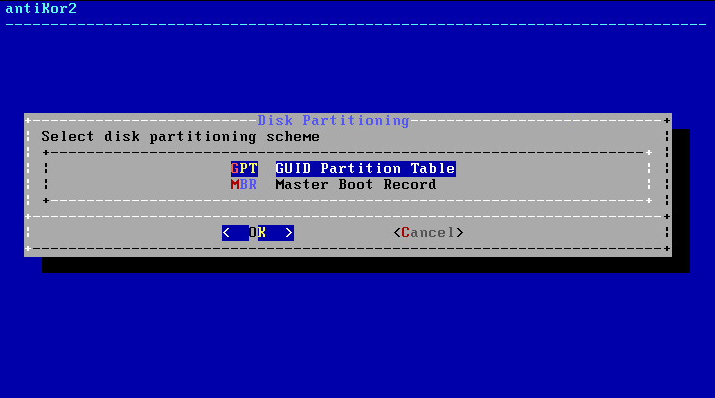
System installation will start after the package download is finished. The next screen is the fdisk process. We should choose GPT in the Disk Partitioning diagram. GPT supports larger disk volumes. MBR does not support disks with capacity more than 2TB.
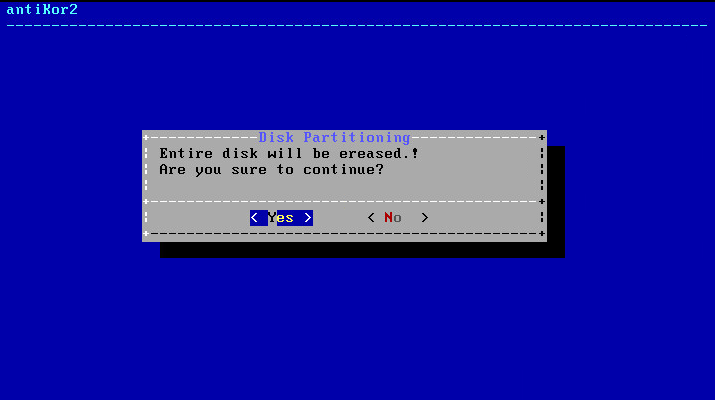
In Disck Configuration screen, choose disk where the installation shall take place.
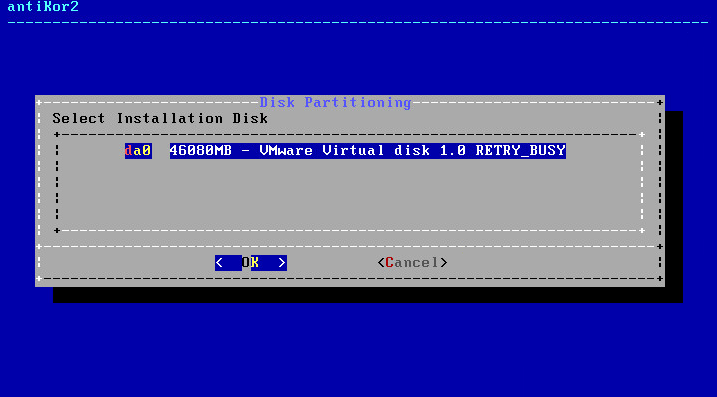
The system informs you that all data in the disk will be erased.
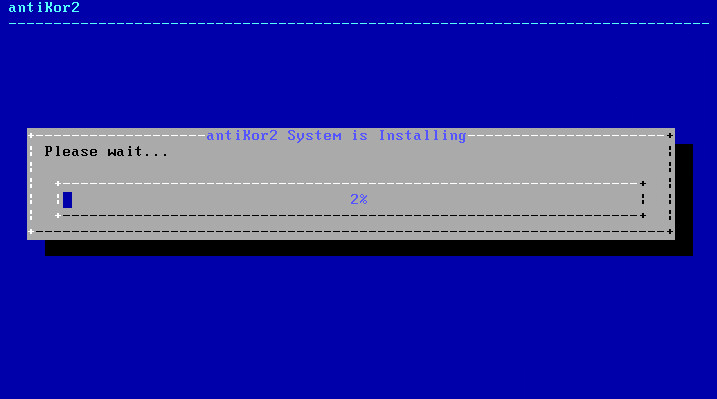
Antikor2 installation begins.
The following message is showed when installation is completed.
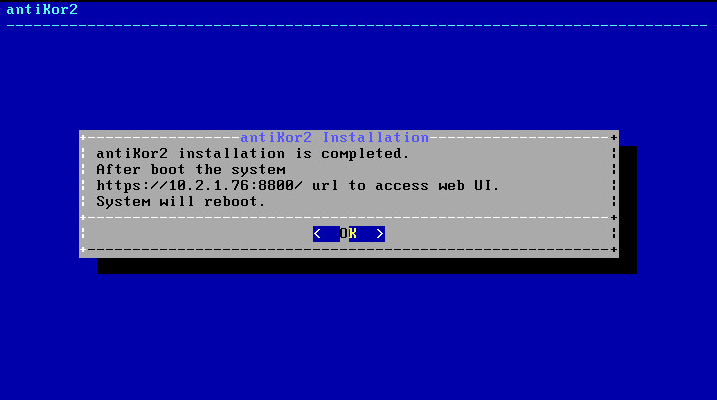
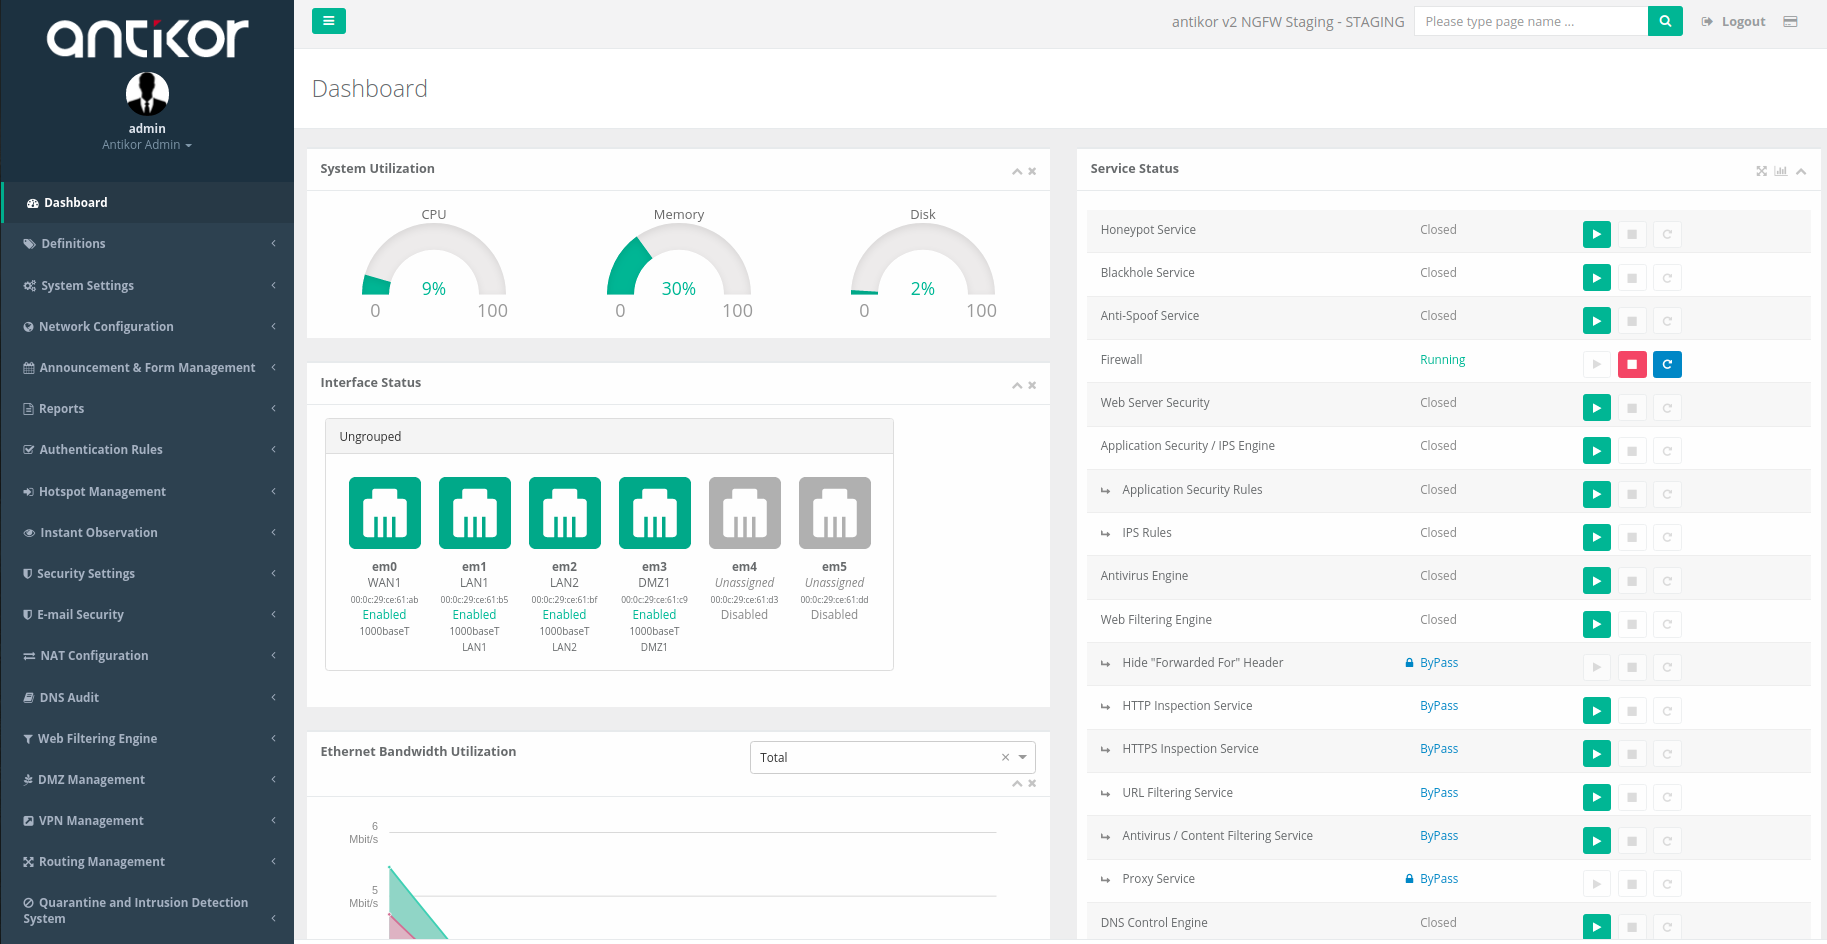
The system restarts and following screen appears. The system is ready. The above is typed in the address bar to log into web interface. During initial login type antikor for username (admin) and password.
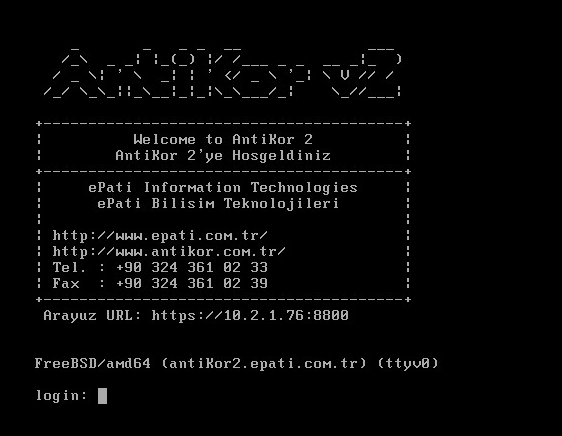
In both console and web interface type antikor for username (admin) and password.
Steps That Must Be Made After Installation
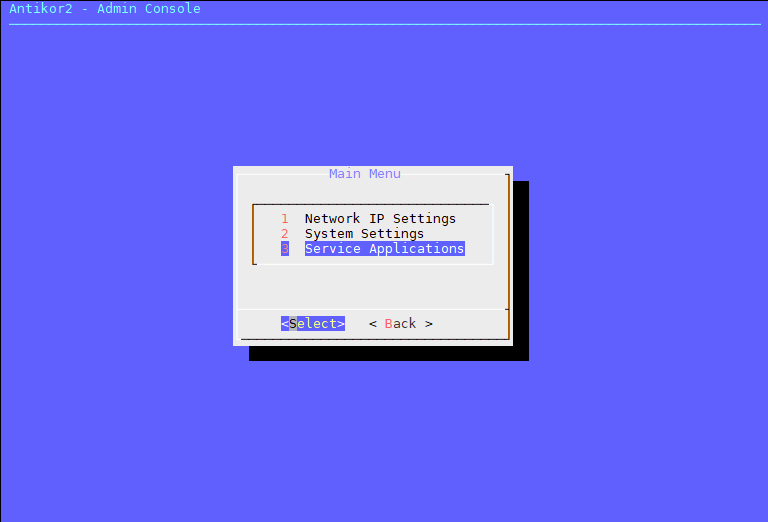
1. Enter The Service Applications menu.
Click the “ Apply configuretions to all service applications” Button and wait for the configurations to finish.
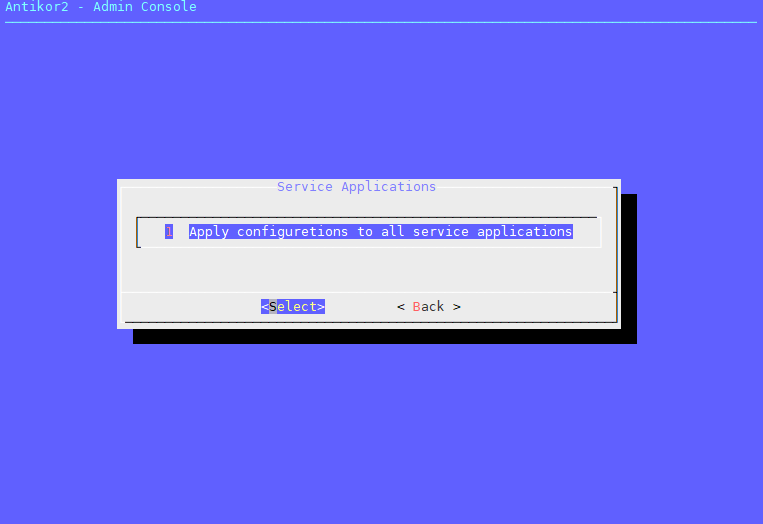
Once the process is complete, the Antikor must be restarted.
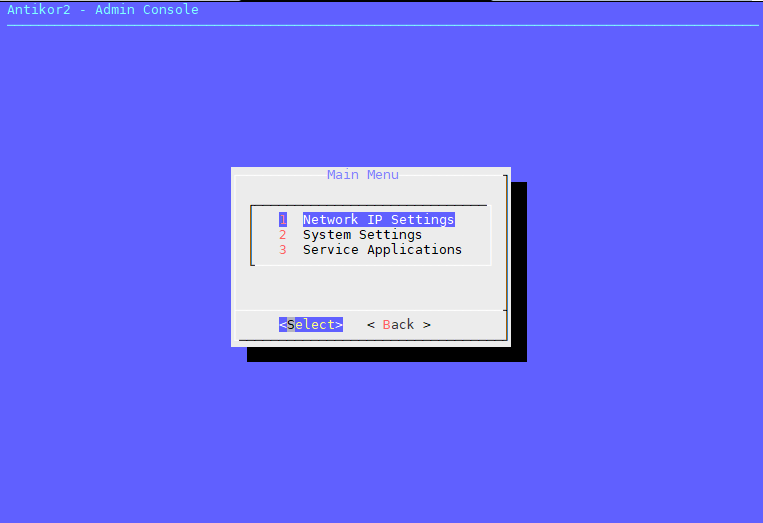
2. IP assignment must be done from on the Admin Console.
Username: admin
Password: antikor
The first thing to do is to open the Network&IP settings menu.
Select the Ethernet port to edit.
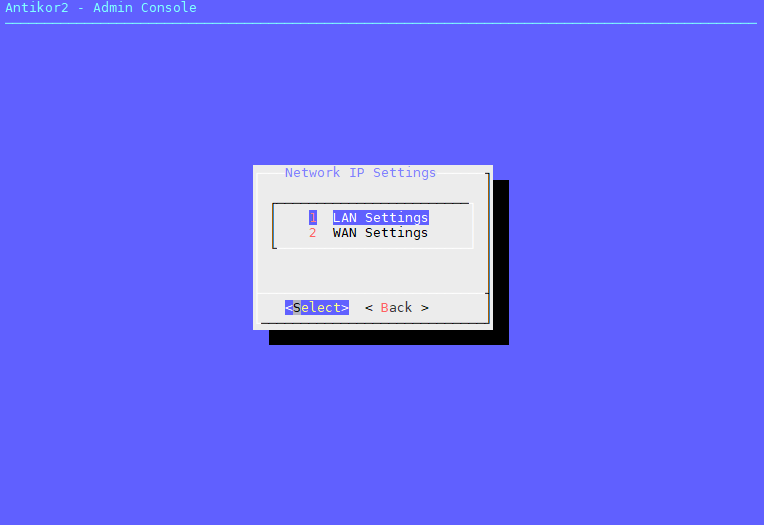
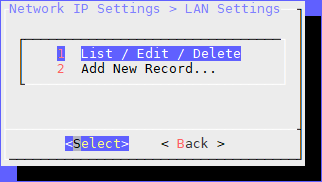
When you open the LAN Settings menu;
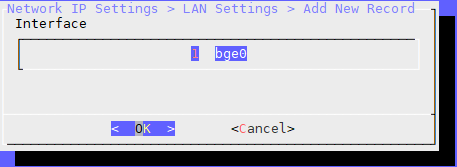
Two submenus will appear. If there is no record, the “Add New Record…” is selected.
When the Add New Record is selected, the Ethernet ports on the device will be displayed. Select the Ethernet port to use for the LAN.
In the IP field, type the IP and subnet mask to use in the LAN IP block.

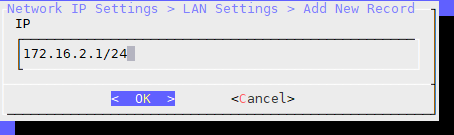
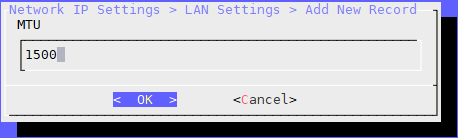
The MTU value is 1500.
After this process, we have defined the IP for the LAN port.
For other ethernet ports, IP addresses can be given in the same way.
3. To enter the WEB interface, we can manually add an IP address that is covered by the LAN IP block to our computer.
We can access the WEB interface with http://172.16.2.1:8800 IP address.
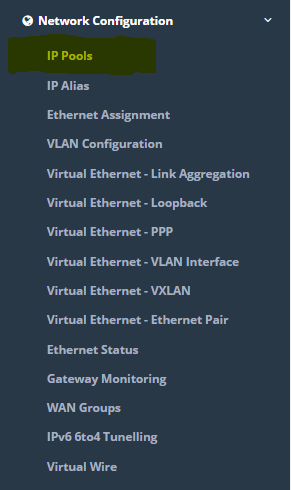
4. Click the IP Pool under the Network Configuration menu.
Click when “Add” button, the IP pool the for LAN will be determined.
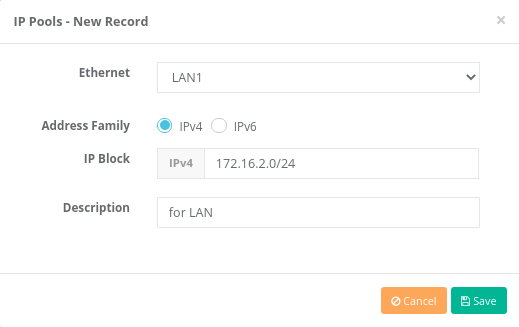
Click when Save button, the IP pool the for LAN port was be determined. For other ethernet ports, IP addresses can be given in the same way.
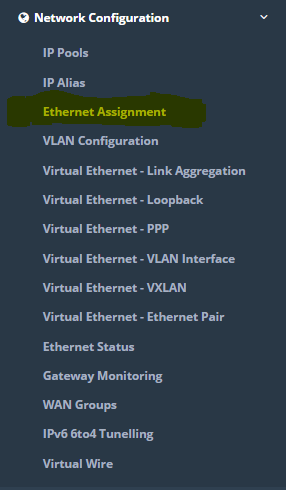
5. Click the Ethernet Assignment under the Network Configuration.
Click when LAN Add button, LAN Ethernet Assignment are performed.

The corresponding settings for the LAN port have been entered. For other ethernet ports, Ethernet Assignment can be make in the same way.
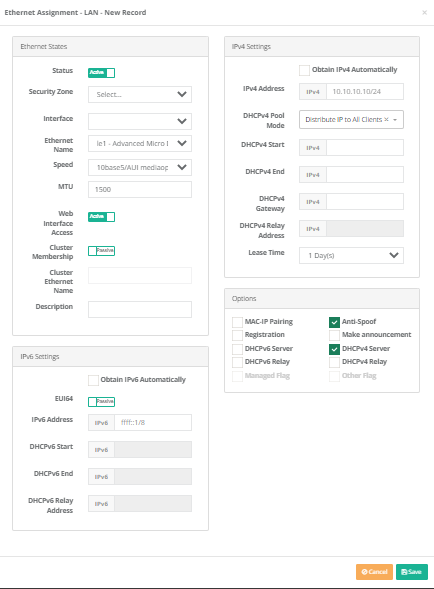
If “DHCPv4 Server” is checked in the options section while performing the Ethernet assignment; The DHCPv4 Service, which is located under the service statuses on the dashboard, should be started.
Note: After installation, no ethernet card should be not mount and dismantle.
6. The default password (antibody) of the admin user needs to be changed.
- Go to User Settings page.

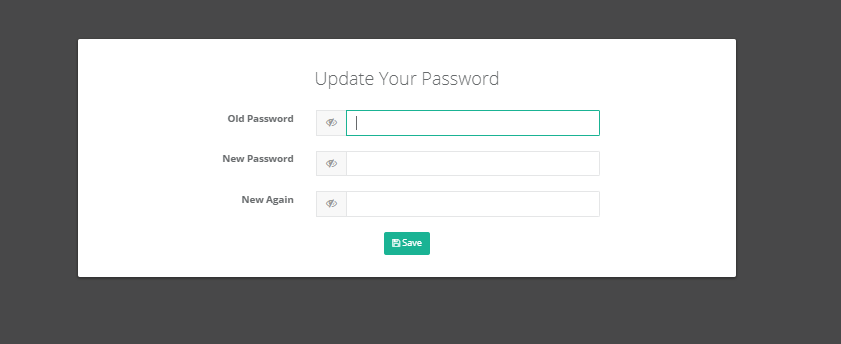
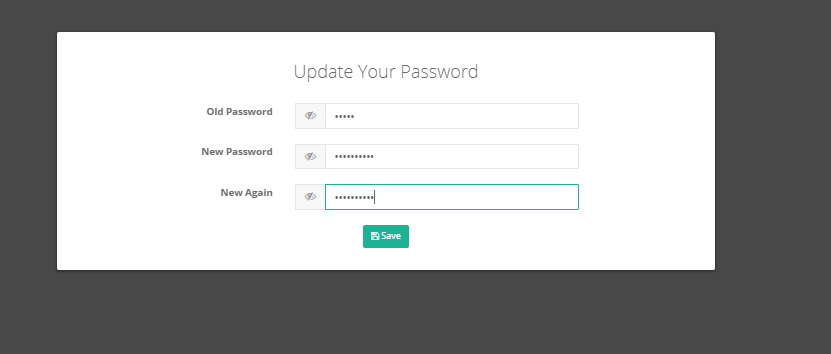
Click the Change User Password button on the User Settings page.
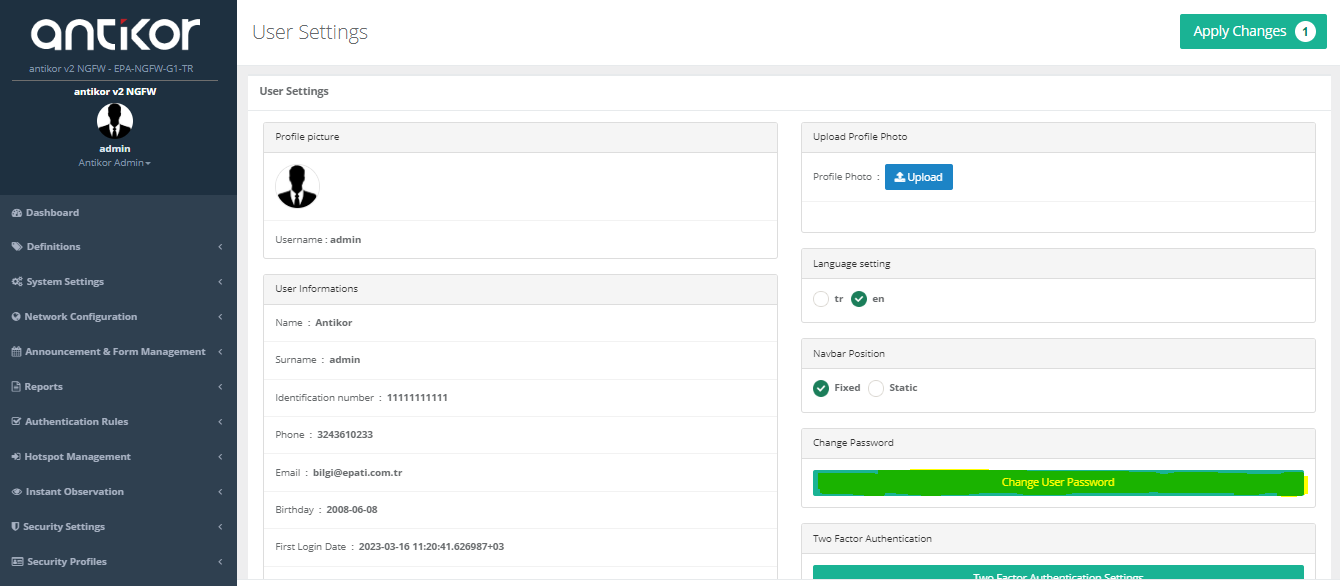
- The password is changed.
- After changing the password, the new password assigned to the admin user is logged in.

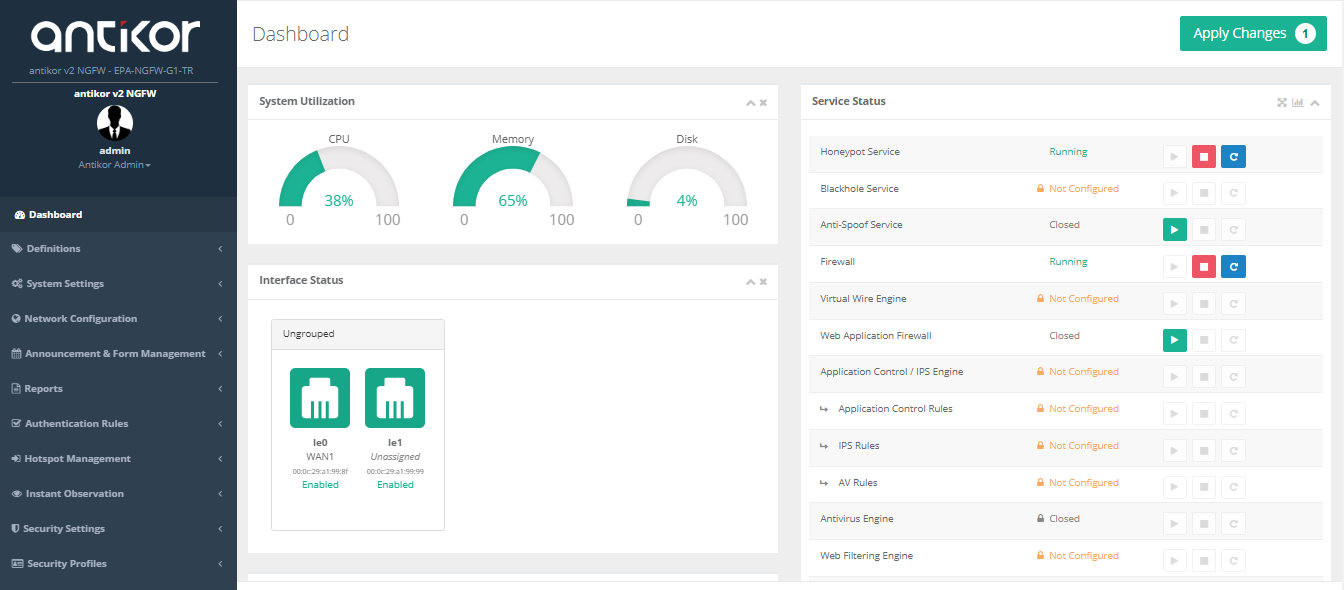
How to access the WEB interface of Antikor Firewall?
Any via web browser (Internet Explorer, Firefox, Chrome etc.) on the computer make can access the device and make the necessary settings. Before you make the software settings, make sure that the setup IP addresses of the Antikor, such as above, are correct and that the cables are installed. After the Antikor server is opened;
- The IP address given to the server is entered in the address section of the browser.
For example;
https://10.2.1.22:8800
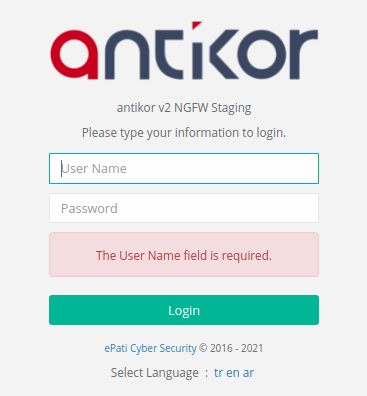
The username admin and password Antikor is entered, after then click Login button.
After login the interface, firstly for security must change password. Click Management Panel Users under the Management Panel Settings menu.

After then click “Details” button.
On opened page the “Edit” button click.
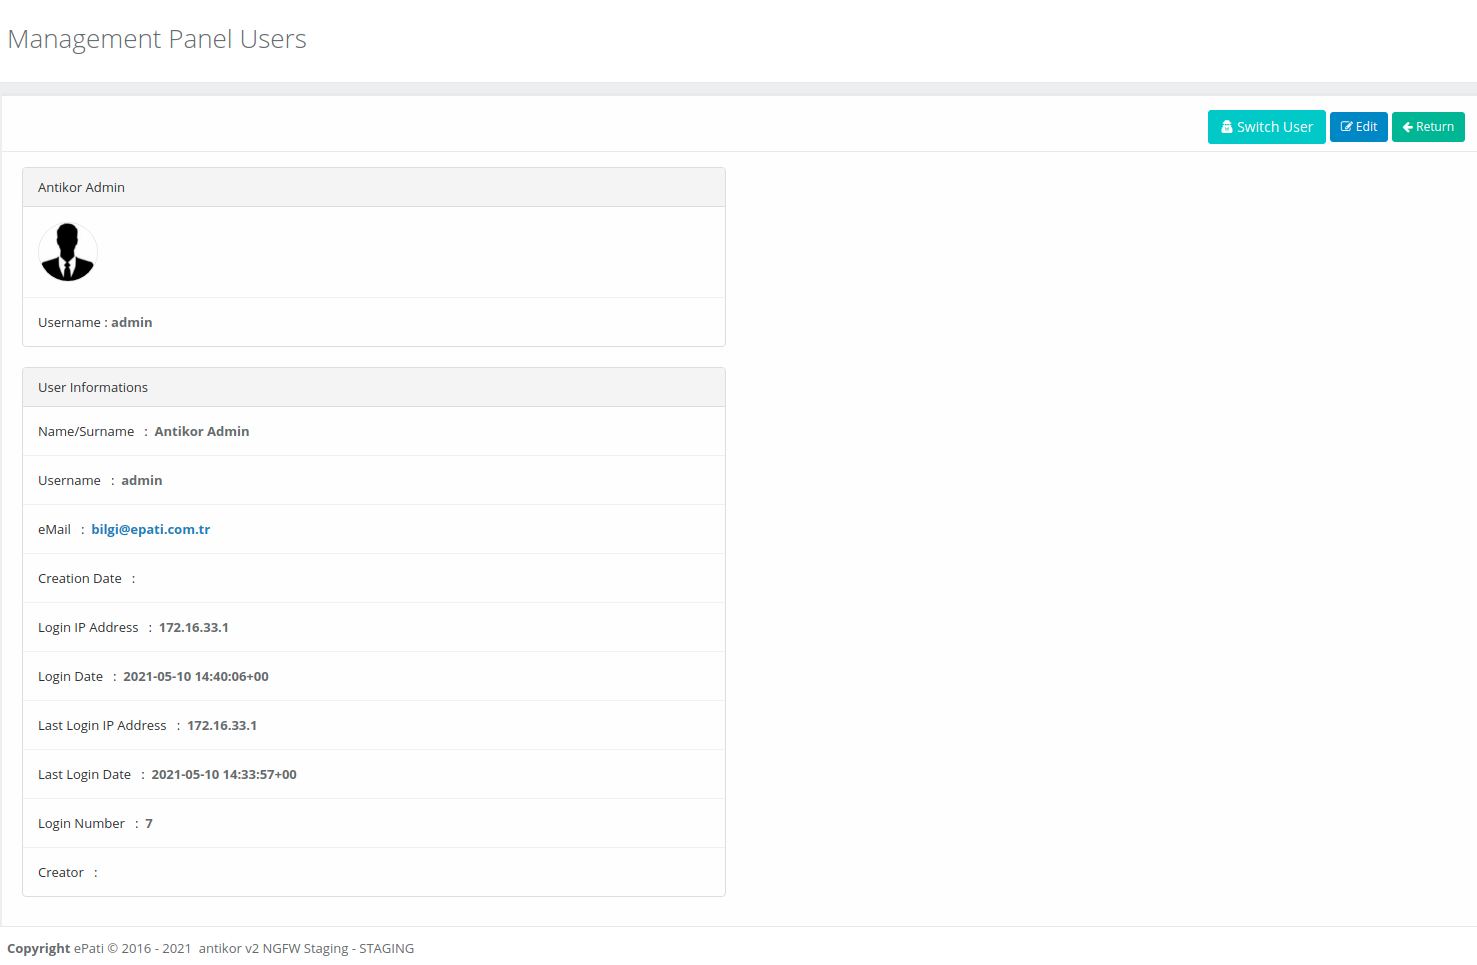
In the User Information section, click the Change User Password button.
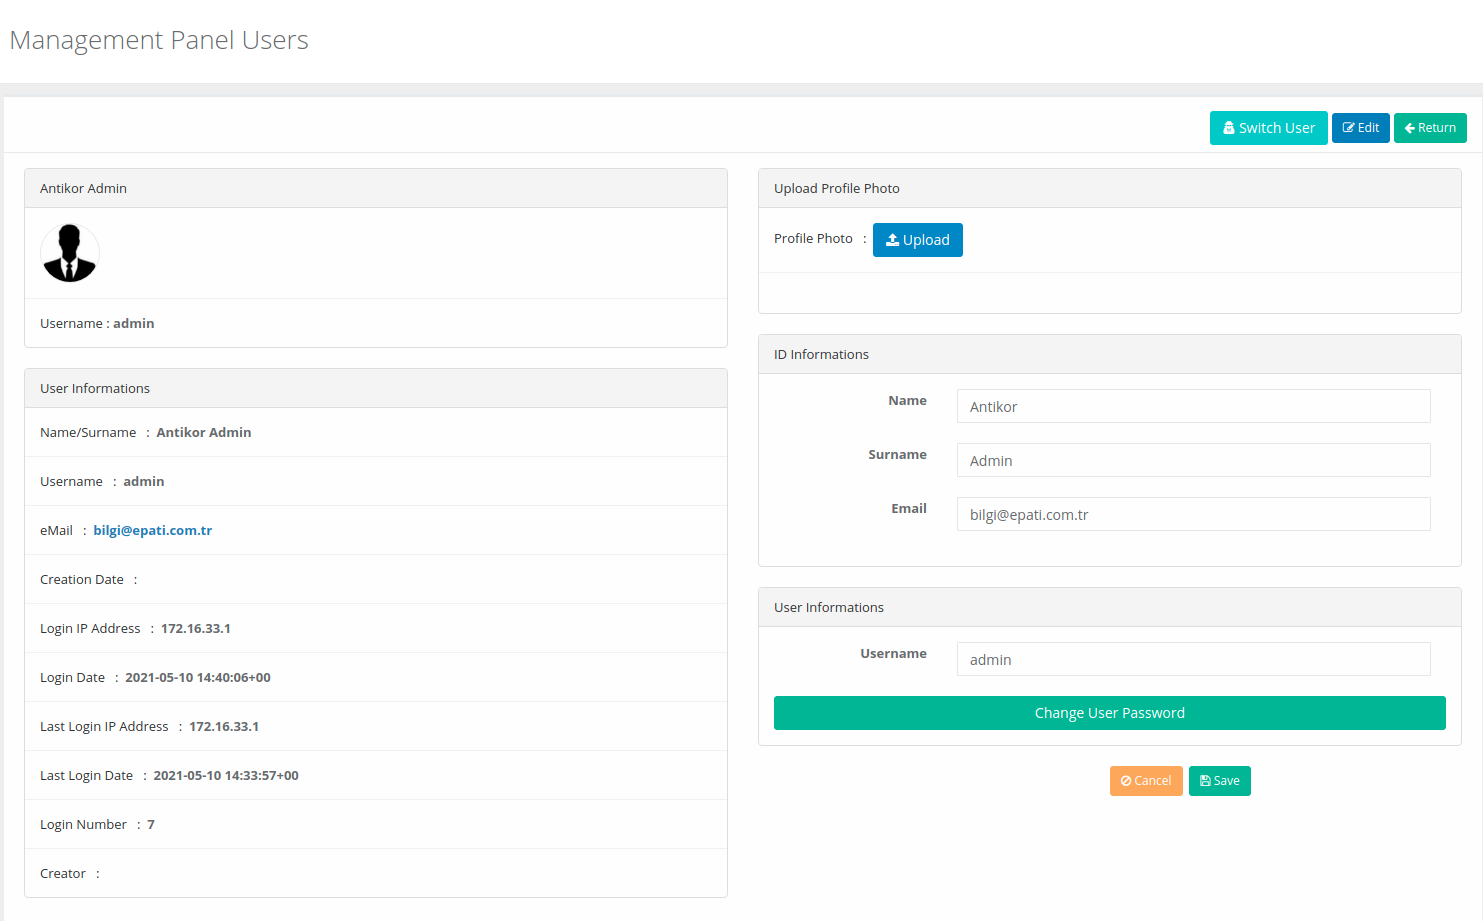
In the Update Password page, enter the new password and click the Save button.

Institutional Security Policy
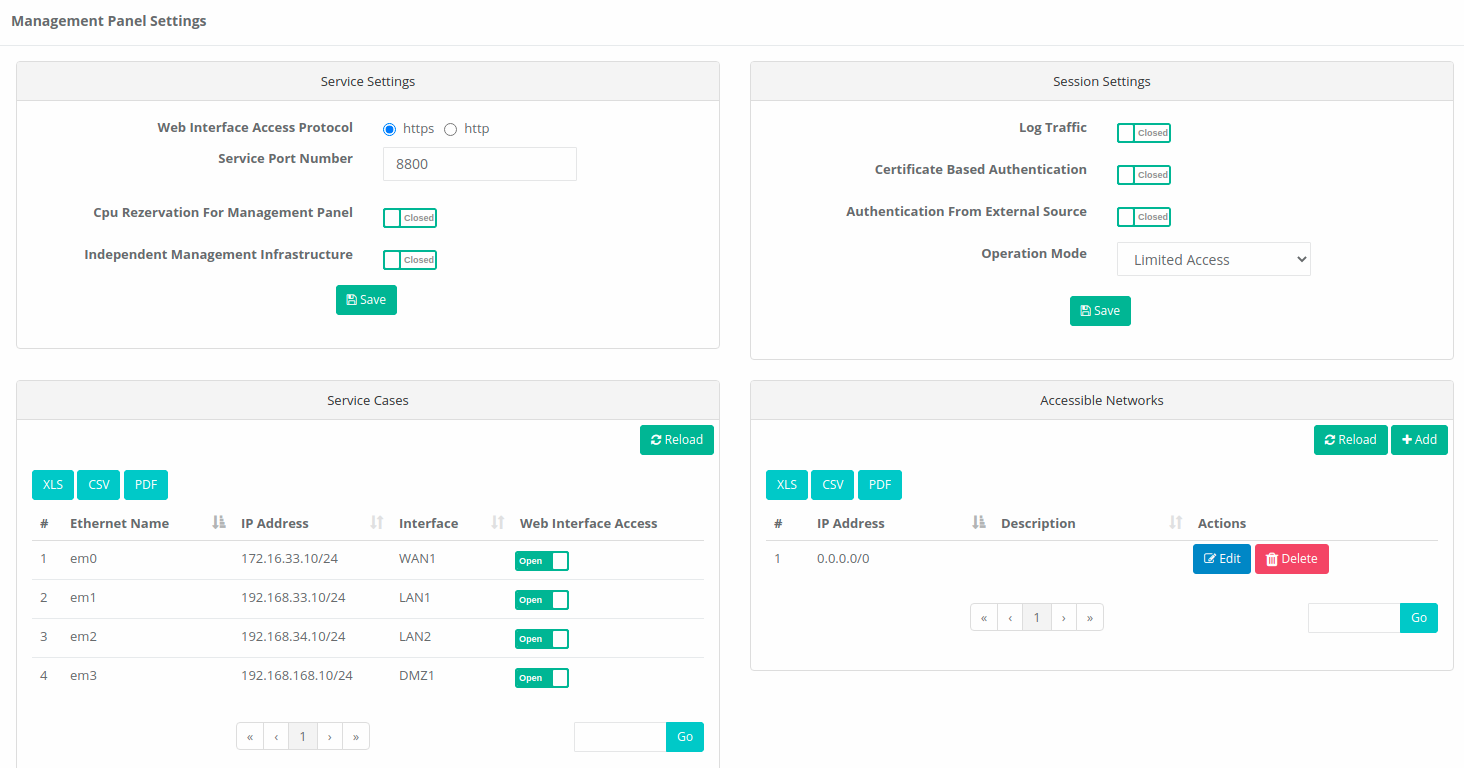
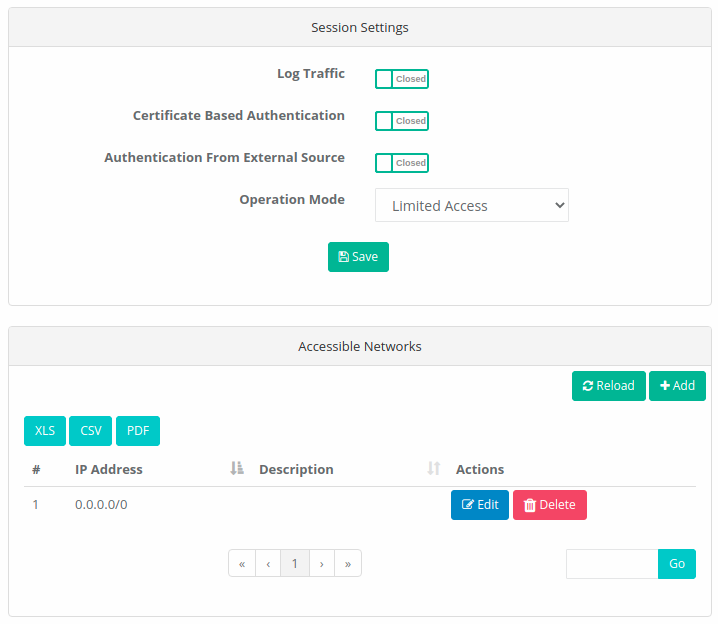
Click, the Management Panel Settings under the Management Panel Settings menu.
For the WEB interface Limitless Access can be opened or that can Limited Access can be specified.
Safe Mode
If any hardware other than Ram is added after the Antikor setup is made, the Antikor switches to Safe Mode for security purposes and does not perform its function.The hardware that has been added must be removed so that the Antikor can continue its function prior to Safe Mode. Re-installation is required to ensure that the hardware is work compatible with the Antikor.
Actions to be Performed after a Failure in the System
In the event of a failure in the system, please follow the steps below.
1. Regarding the failure, after post process which the malfunction occurred technical support should be requested with the details encountered and error output.
2. If the failure affects only certain services, the service should be closed.
3. If the fault has a negative effect on the whole system and the backup system is present, the backup system must be activated.
ePati Cyber Security Co.

Mersin Üniversitesi Çiftlikköy Kampüsü
Teknopark İdari Binası Kat:4 No: 411
Posta Kodu: 33343
Yenişehir / Mersin / TURKEY
Web: www.epati.com.tr
e-Mail: info@epati.com.tr
Tel: +90 324 361 02 33
Fax: +90 324 361 02 39